Welcome to the ultimate MacBook Neo User Guide. In 2026, the digital landscape continues to evolve at a breakneck pace, and for many, the Apple ecosystem remains a beacon of user-friendly technology. The MacBook Neo, a hypothetical addition to Apple’s esteemed laptop lineup, promises the sleek design and intuitive interface that users have come to expect, but with enhanced features and performance tailored for the modern user.
Whether you’re a first-time laptop owner or switching from another operating system, setting up your new MacBook Neo can seem daunting. This comprehensive guide will walk you through every step, from unboxing to your first productive session, ensuring a smooth and enjoyable experience. With over 1.5 billion active Apple devices globally as of early 2026, the appeal of macOS continues to grow, and understanding your new MacBook Neo is key to unlocking its full potential. Source: Statista
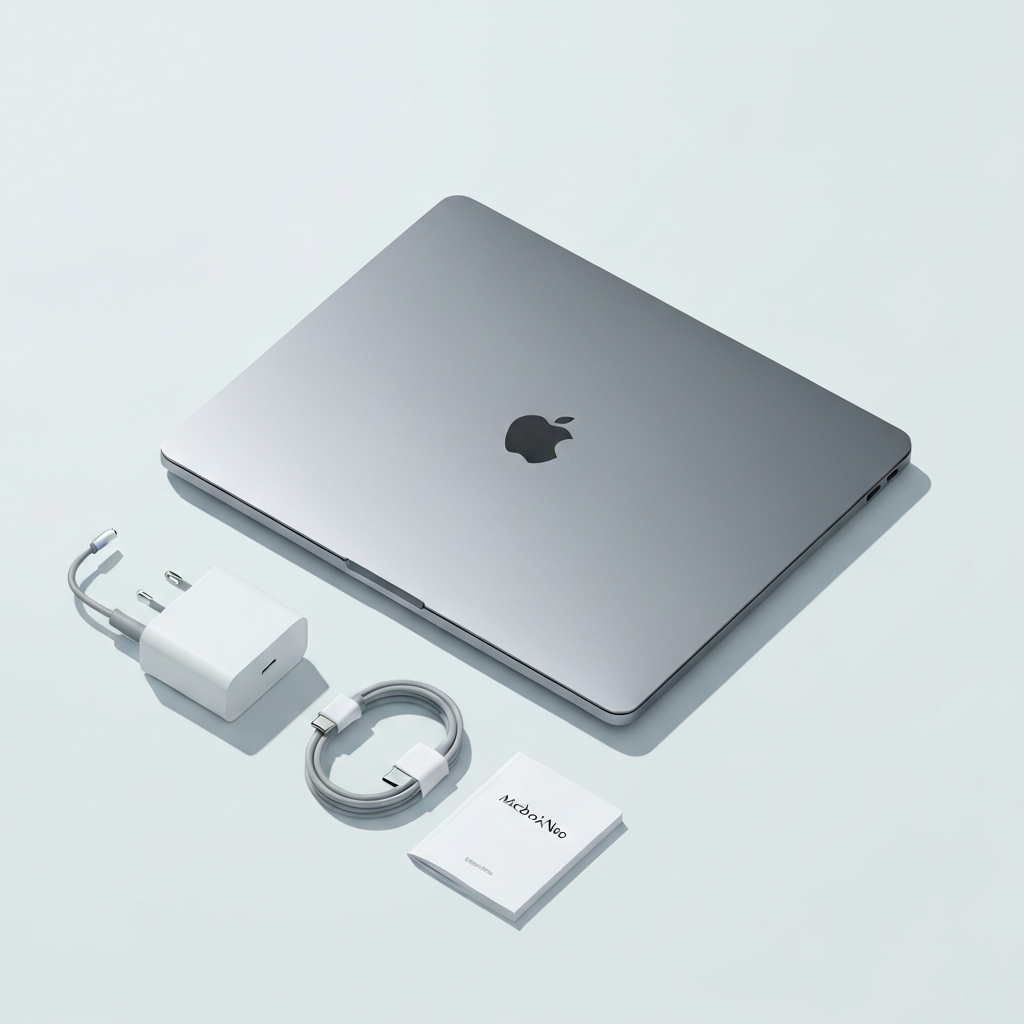
Unboxing Your MacBook Neo: What’s Inside?
The Apple unboxing experience is renowned for its minimalist elegance. As you open the sleek, recyclable box of your MacBook Neo, you’ll find:
- The MacBook Neo itself: Carefully cradled within protective packaging.
- USB-C Power Adapter: This is your charger, essential for keeping your device powered. Apple’s commitment to sustainability means this adapter is likely designed for energy efficiency.
- USB-C Charge Cable: A durable cable to connect your MacBook Neo to the power adapter.
- Documentation: A brief setup guide and warranty information. While these are helpful, this user guide will provide much more in-depth, step-by-step instructions.
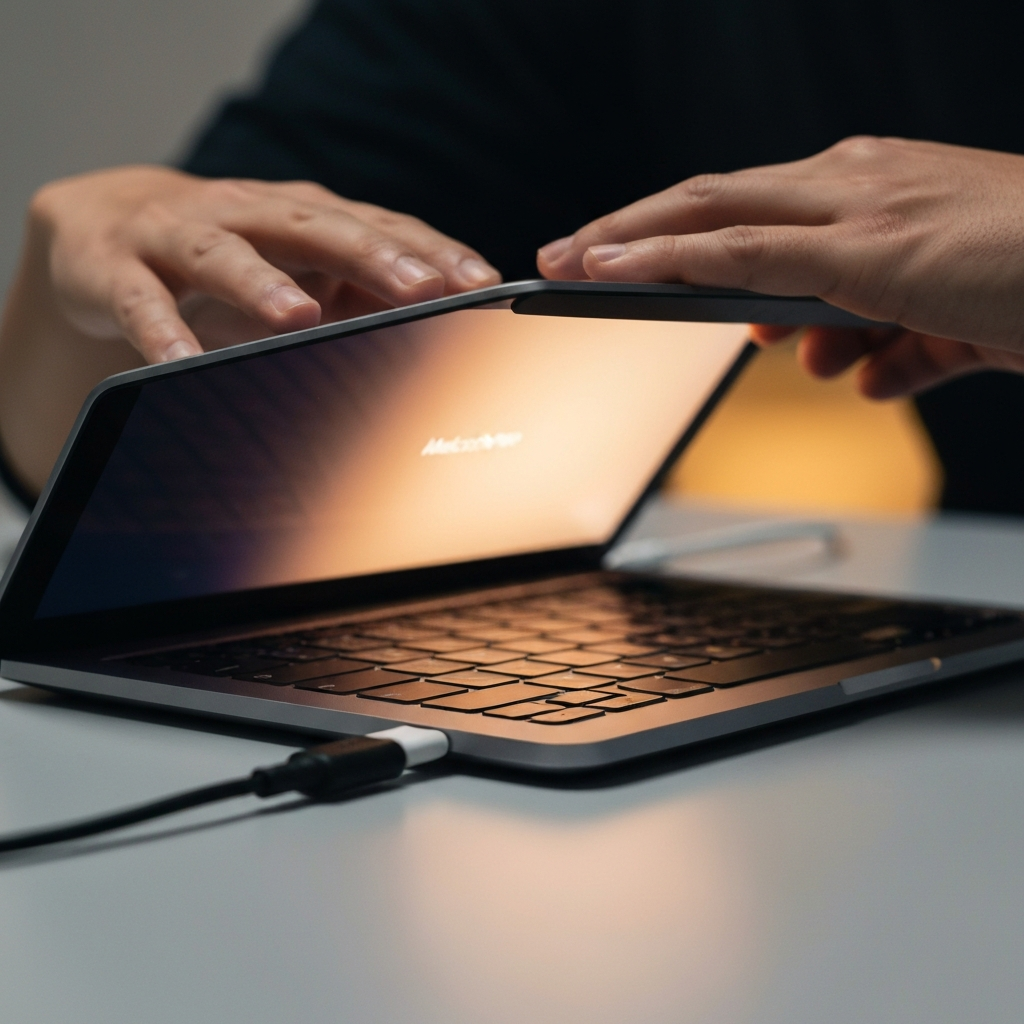
Take a moment to admire the craftsmanship. The unibody aluminum construction, the vibrant Retina display, and the redesigned Magic Keyboard are all hallmarks of Apple’s design philosophy. Before powering on, ensure you have a stable Wi-Fi connection available, as it will be crucial for the initial setup process.
The First Power-On: Welcome to macOS Setup Assistant
Once you’ve located a suitable power outlet, connect the USB-C cable to your laptop and the power adapter, then plug it into the wall. Gently open the lid of your machine. The device will spring to life, and you’ll be greeted by the familiar macOS Setup Assistant. This intelligent assistant, as highlighted in this MacBook Neo User Guide, guides you through configuring your new Mac, personalizing it to your needs.
1. Select Your Country or Region
The first screen asks you to choose your country or region. This selection helps set up language preferences, date and time formats, and other region-specific settings. Use your trackpad to navigate and click on your desired location.
2. Language Selection
Next, you’ll be prompted to select your preferred language. macOS supports a vast array of languages, ensuring a comfortable experience for users worldwide. Choose the language you are most familiar with.
3. Accessibility Options
Before proceeding, macOS offers accessibility features. These include VoiceOver (a screen reader), Zoom, Display options, and more. If you require any of these, you can enable them now or at a later time through System Settings. For most users, you can simply click “Not Now” or proceed to the next step.
4. Connect to Wi-Fi
A stable internet connection is vital for completing the setup. Your MacBook Neo will scan for available Wi-Fi networks. Select your network from the list and enter the password when prompted. If you don’t have a Wi-Fi network, you can choose to connect using an Ethernet adapter (sold separately) or skip this step and connect later, though many setup features require internet access. According to recent reports, Wi-Fi 7 is becoming increasingly common, and your MacBook Neo will likely support the latest wireless standards for faster, more reliable connections.Source: Wi-Fi Alliance
5. Data & Privacy
Apple emphasizes privacy. You’ll see a screen explaining how macOS handles your data. Read through this information and click “Continue” to proceed.
6. Migration Assistant
This is a crucial step if you’re transferring data from an old MacBook Neo User Guide or a Windows PC.
- Transfer from a Mac: If you have another MacBook Neo User Guide, you can use Migration Assistant to transfer user accounts, applications, settings, and files. You can do this wirelessly, via a USB-C cable, or by using a Time Machine backup.
- Transfer from a Windows PC: Migration Assistant also supports transferring data from Windows computers. You’ll need to download the Windows Migration Assistant application on your PC beforehand.
- Don’t Transfer Any Information Now: If this is your first computer, or you prefer to start fresh, select this option.
For beginners, starting fresh is often the simplest approach. If you do choose to migrate, ensure both computers are on the same Wi-Fi network and follow the on-screen prompts carefully.
7. Sign in with your Apple ID
It’s highly recommended to sign in with your Apple ID during setup, as we highly suggest in this MacBook Neo User Guide. It allows for seamless syncing of data across your Apple devices and enables features like Find My MacBook Neo User Guide.
- Sign In: Enter your existing Apple ID email address and password.
- Create a Free Apple ID: If you don’t have one, click this option to create a new Apple ID. You’ll need to provide a valid email address, set a strong password, and verify your identity.
- Set Up Later: You can also choose to set up your Apple ID later within System Settings.
It’s highly recommended to sign in with your Apple ID during setup. It allows for seamless syncing of data across your Apple devices and enables features like Find My MacBook Neo User Guide.
8. iCloud Settings
Once logged in with your Apple ID, you’ll configure iCloud. As noted in this beginner-friendly MacBook Neo User Guide, iCloud Drive stores your documents and desktop files in the cloud, making them accessible from any device signed in with your Apple ID. You can also choose to enable Photos, Keychain (for securely storing passwords), and other iCloud features. For beginners, enabling iCloud Drive and Keychain is generally a good idea.
9. Screen Time
Screen Time helps you understand and manage how you and your family spend time on your MacBook Neo User Guide. You can set app limits, downtime schedules, and content restrictions. You can enable this now or configure it later in System Settings.
10. Choose a Look
Personalize your MacBook Neo’s appearance with Light Mode or Dark Mode. Following the steps in this comprehensive MacBook Neo User Guide, you will find that Dark Mode is easier on the eyes in low-light conditions and can reduce eye strain. You can switch between them anytime.
11. True Tone Display
If your MacBook Neo User Guide features a True Tone display, you’ll have the option to enable it. True Tone technology automatically adjusts the display’s color temperature to match the ambient light, making colors appear more natural.
12. Set Up Touch ID
Most modern MacBook Neo User Guide feature Touch ID for secure login and authentication. Follow the on-screen prompts to register your fingerprint. You’ll be asked to lift and place your finger multiple times on the Touch ID sensor. You can add more fingerprints later in System Settings.
13. Set Up Apple Pay
If you plan to use Apple Pay for online purchases, you can easily set it up now by adding a credit or debit card. As detailed in this MacBook Neo User Guide, this quick process requires verification from your bank.
14. Siri Setup
Activate Siri, Apple’s intelligent voice assistant, by saying “Hey Siri” or holding down the Command and Space bar keys. In this part of the MacBook Neo User Guide, you’ll be asked to speak a few phrases to help Siri recognize your voice.
15. Analytics
Decide whether you want to share diagnostic and usage data with Apple and app developers to help improve their products. As noted in this MacBook Neo User Guide, you can choose to share or not share this data during the setup process.
16. FileVault Disk Encryption
FileVault is a security feature that encrypts your entire startup disk, protecting your data from unauthorized access. This MacBook Neo User Guide highly recommends enabling FileVault for enhanced security. You’ll be given a recovery key – write this down and store it in a safe, separate location. Losing this key means losing access to your data if you forget your login password.
17. Choose Your Appearance
Finally, you’ll be presented with the option to choose your preferred appearance – Light or Dark mode. This choice affects the overall look of macOS, and you can always adjust it later using the steps outlined in this MacBook Neo User Guide.
Navigating macOS: The Basics
After the Setup Assistant completes, you’ll arrive at your macOS Desktop. This is your main workspace. Let’s familiarize ourselves with the key components using this beginner MacBook Neo User Guide.
The Menu Bar
Stretching across the top of the screen, the Menu Bar contains vital shortcuts and system settings. According to this MacBook Neo User Guide, the Menu Bar contains:
- Apple Menu (): In the top-left corner, this menu provides access to system-wide actions like About This Mac, System Settings, App Store, Sleep, Restart, Shut Down, and Lock Screen.
- Application Menu: To the right of the Apple Menu, this displays the menus for the currently active application (e.g., File, Edit, View).
- Status Icons: On the right side, you’ll find icons for Wi-Fi, Battery status, Spotlight search, Control Center, and the Clock.
The Dock
Located at the bottom of the screen (by default), the Dock is your application launcher and switcher. It contains icons for frequently used apps, open applications, and the Trash. You can customize its position and size in System Settings, as explained later in this MacBook Neo User Guide.
Finder
Finder is your file management application. Think of it as the equivalent of File Explorer on Windows. You can open Finder by clicking its smiling face icon in the Dock. It allows you to browse your files, folders, applications, and external drives.
Spotlight Search
Press Command (⌘) + Space bar to open Spotlight. This powerful search tool can find files, applications, emails, web results, and perform calculations. It’s one of the fastest ways to locate anything on your MacBook Neo User Guide.
Setting Up Essential Applications
Now that your MacBook Neo User Guide is set up, let’s look at configuring some core applications.
- Open the Mail app from the Dock.
- The Mail Assistant will guide you through adding your email accounts. Select your email provider (e.g., iCloud, Google, Outlook) and follow the prompts to enter your username and password.
- If your provider isn’t listed, choose “Other Mail Account” and enter the necessary server details (IMAP/POP and SMTP settings), which you can usually find on your email provider’s website.
Calendar
The Calendar app syncs with your iCloud, Google, or other calendar accounts. Open Calendar from the Dock, and it should automatically display events from any calendars you’ve added via your Apple ID or other accounts.
Safari
Safari is Apple’s web browser. Open it from the Dock. You can start browsing immediately. To manage settings like your homepage, search engine, and privacy preferences, go to Safari > Settings (or Preferences) in the Menu Bar. For a comprehensive overview of web browsing and online safety, resources like the Electronic Frontier Foundation (EFF) offer valuable information.
App Store
The App Store is where you can download new applications for your MacBook Neo User Guide. Open it from the Dock and browse categories or search for specific apps. You’ll need your Apple ID to download free or paid applications.
System Settings: Personalizing Your MacBook Neo
System Settings (formerly System Preferences) is where you control almost every aspect of your machine. As emphasized throughout this MacBook Neo User Guide, you can access it anytime from the Apple Menu () > System Settings to customize your device.
Wi-Fi and Network
Here you can manage your Wi-Fi connections, view network status, and configure advanced network settings.
Bluetooth
Pair Bluetooth devices like wireless mice, keyboards, headphones, and speakers. Ensure your device is in pairing mode and select it from the list in System Settings.
Users & Groups
Manage user accounts on your MacBook Neo User Guide. You can create new accounts, change passwords, and set parental controls.
Display
Adjust screen brightness, resolution, and color settings. You can also configure Night Shift, which reduces blue light in the evening to help you sleep better.
Battery
Monitor your battery usage, optimize battery performance, and set battery health management options.
Keyboard
Customize keyboard settings, including text shortcuts, input sources (languages), and key repeat rates.
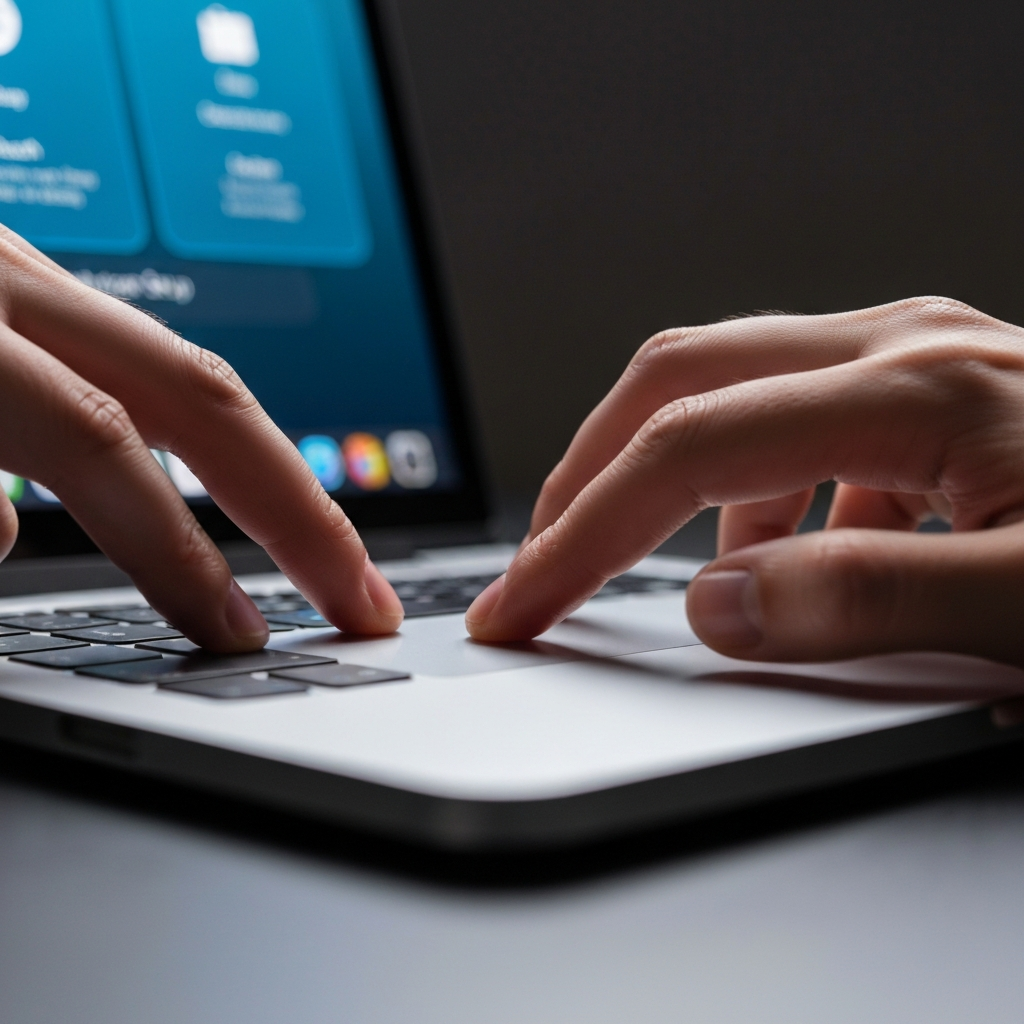
Trackpad
Fine-tune your trackpad experience. Adjust tracking speed, scrolling direction, and enable/disable various gestures like pinch-to-zoom, swipe between pages, and Mission Control. Mastering trackpad gestures can significantly boost your productivity.
Security & Privacy
This is a critical section. Here you can manage:
- Firewall: Enable or disable the built-in firewall.
- FileVault: Turn disk encryption on or off (recommended to keep it on).
- Privacy: Control which apps have access to your location, contacts, photos, microphone, camera, and other sensitive data. Review these permissions regularly.
- App Permissions: Grant or deny specific permissions requested by applications.
Software Update
Keep your macOS up-to-date. Apple regularly releases updates that include new features, security patches, and bug fixes. It’s essential to install these updates promptly. You can check for updates manually here or enable automatic updates. Staying current with software updates is a fundamental aspect of cybersecurity. Source: Cybersecurity & Infrastructure Security Agency (CISA)
Essential MacBook Neo User Guide Tips for Beginners
Keyboard Shortcuts
Learning a few basic keyboard shortcuts can dramatically speed up your workflow:
- Command (⌘) + C: Copy
- Command (⌘) + V: Paste
- Command (⌘) + X: Cut
- Command (⌘) + Z: Undo
- Command (⌘) + A: Select All
- Command (⌘) + S: Save
- Command (⌘) + F: Find
- Command (⌘) + Tab: Switch between open applications
- Command (⌘) + Q: Quit an application
Trackpad Gestures
Familiarize yourself with these common trackpad gestures:
- Tap to Click: Enable this in Trackpad settings to tap the trackpad instead of physically pressing it to click.
- Two-Finger Scroll: Swipe up or down with two fingers to scroll.
- Pinch to Zoom: Place two fingers on the trackpad and move them apart to zoom in, or bring them together to zoom out.
- Two-Finger Swipe: Swipe left or right with two fingers to go back or forward in web pages or documents.
- Three-Finger Swipe: Swipe up with three fingers to show Mission Control (all open windows) or swipe down to show App Exposé (all windows of the current app).
- Four-Finger Swipe: Swipe left or right to switch between full-screen apps or Desktops. Swipe up to show Mission Control.
Managing Files and Folders
- Creating Folders: In Finder, go to File > New Folder, or press Shift + Command (⌘) + N.
- Moving Files: Drag and drop files into folders. Holding the Option key while dragging will copy the file instead of moving it.
- Deleting Files: Drag files to the Trash icon in the Dock, or select them and press Command (⌘) + Delete. Empty the Trash to permanently remove files.
- Using Tags: Finder allows you to add color-coded tags to files and folders for better organization. Right-click on a file and select “Tags…”.
Backing Up Your Data
Regular backups are crucial to prevent data loss. Consider using:
- Time Machine: Apple’s built-in backup software. Connect an external hard drive, and Time Machine will automatically back up your entire system. Access it via System Settings > General > Time Machine.
- iCloud Drive: For documents and desktop files, iCloud Drive provides cloud storage and synchronization. Ensure it’s enabled and configured correctly.
- Cloud Storage Services: Third-party services like Dropbox, Google Drive, or OneDrive can also be used for backing up specific files or folders.
Getting Help
- Help Menu: Most applications have a “Help” menu in the Menu Bar. This provides context-sensitive help for the app you’re using.
- Spotlight Search: Type “Help” into Spotlight to find built-in macOS help documentation.
- Apple Support Website: The official Apple Support website is an invaluable resource for troubleshooting, guides, and community forums.
Advanced Setup and Customization
Once you’re comfortable with the basics covered in this MacBook Neo User Guide, you might want to explore more advanced features to truly personalize your laptop:
Setting Up External Displays
If you connect an external monitor, macOS should detect it automatically. You can arrange displays, set primary displays, and adjust resolutions in System Settings > Displays.
Connecting Peripherals
Use the USB-C ports to connect external hard drives, printers, webcams, and other peripherals. Some devices may require driver installation, usually available from the manufacturer’s website.
Installing Software
- App Store: The safest and easiest way to get apps.
- Downloaded Applications (.dmg files): Many apps are distributed as disk image (.dmg) files. Double-click the .dmg file to mount it, then drag the application icon into your Applications folder. Eject the .dmg file afterward.
- Package Installers (.pkg files): Double-click the .pkg file and follow the on-screen installation wizard.
User Accounts and Permissions
For families or shared computers, setting up separate user accounts is essential. You can create Standard, Administrator, Managed, and Sharing Only accounts in System Settings > Users & Groups. Administrators have full control, while Standard users have limited privileges, enhancing security.
Automation with Shortcuts
macOS includes a Shortcuts app, allowing you to automate repetitive tasks by creating custom workflows. You can find it in the Applications folder.
Conclusion
Setting up a new MacBook Neo might seem like a complex process, but by following this comprehensive MacBook Neo User Guide, you can navigate the initial configuration with ease. From unboxing and powering on to connecting to Wi-Fi, signing in with your Apple ID, and familiarizing yourself with the macOS interface, this step-by-step MacBook Neo manual provides a solid foundation.
Remember to explore System Settings to personalize your experience, learn essential keyboard shortcuts, and master trackpad gestures for ultimate efficiency. Prioritizing regular backups for data security is also a must. The MacBook Neo User Guide, like all Apple products, is designed to be highly intuitive. With a little exploration of this MacBook Neo User Guide, you’ll soon be harnessing its full power for productivity, creativity, and entertainment. Welcome to the world of macOS!
Frequently Asked Questions
What is the primary purpose of the Setup Assistant on a MacBook Neo?
The Setup Assistant is designed to guide new users through the initial configuration of their MacBook Neo. It helps you select your country and language, connect to Wi-Fi, sign in with your Apple ID, migrate data from another computer, and set up essential services like iCloud and Siri. It ensures your Mac is personalized and ready to use right out of the box.
How do I transfer my files from an old computer to my new MacBook Neo?
You can use the Migration Assistant application, which is part of macOS. During the initial Setup Assistant, you’ll be prompted to use it. You can transfer data wirelessly from another Mac, via a USB-C cable, or from a Time Machine backup. If you’re moving from a Windows PC, you’ll need to download the Windows Migration Assistant on your PC first. Alternatively, you can manually transfer files using external storage devices or cloud services.
What is an Apple ID and why is it important for my MacBook Neo?

An Apple ID is a personal account used to access all of Apple’s digital services and devices. For your MacBook Neo, it’s essential for downloading apps from the App Store, syncing data across your Apple devices via iCloud (like photos, documents, and contacts), using services like Apple Music and Apple TV+, and enabling features like Find My Mac. It’s the central hub for your Apple experience.
How can I ensure my MacBook Neo is secure?
Security on your MacBook Neo can be enhanced in several ways. Firstly, enable FileVault disk encryption in System Settings > Privacy & Security to protect your data. Use a strong login password and consider setting up Touch ID for quick, secure access. Regularly update macOS through System Settings > General > Software Update, as updates often include critical security patches. Also, carefully review app permissions in System Settings > Privacy & Security to control what data applications can access. Using a firewall, available in the same settings pane, adds another layer of protection.
What are macOS Gestures, and how do they improve usability?
macOS gestures are intuitive multi-finger movements performed on the trackpad that allow you to control your Mac without using keyboard shortcuts or the mouse. Examples include two-finger scrolling, pinch-to-zoom, three-finger swipes for Mission Control or App Exposé, and four-finger swipes to switch between desktops or full-screen apps. Mastering these gestures can significantly speed up navigation and interaction with your MacBook Neo, making your workflow more fluid and efficient. You can customize these gestures in System Settings > Trackpad.
At DailyDealSpot24, our testing suite for 2026 involves more than just plugging in a dongle.